glennatabor

The Easiest Way to Try Hydroponics
Have you ever wondered what is happening under the soil as a plant grows? Most of the time, we only see the leaves and stems above the ground. The roots are hidden.

With hydroponics in a clear quart-size jar, you can see the whole root system as it grows! You can start with a tiny seed and watch as the first roots appear. Then you can see those roots grow longer and spread through the water. You get to see a part of plant growth that is usually hidden below the soil. You don’t need an expensive hydroponic system to do it.

You can get started with a quart-size jar, a small plastic cup, a piece of sponge, and a few other basic supplies. This simple way of growing is called the Kratky method. It does not use a water pump or an air pump. The plant gets the water, nutrients, and oxygen it needs right from the jar.

It’s an easy way to try hydroponics for the first time and a great way to see how a plant grows from seed to harvest.

How Does the Kratky Method Work?

In a Kratky hydroponic system, the plant grows above water mixed with nutrients. As the seed sprouts, its roots grow through the sponge and down into the water.

As the plant uses the water, the water level drops and creates an air gap. Some roots stay in the water to take in water and nutrients, while others get oxygen from the air gap.

With a clear jar, you can watch the roots grow and see this process happen!

Materials

You will need:

  • 1 clear quart-size jar
  • 1 small plastic cup that fits inside the opening of the jar
  • A tool for making small holes in the plastic cup
  • 1 clean, unused sponge, cut into a 1-inch square. (Use a plain sponge with no soap, cleaners, antibacterial treatment, or scrubbing pad.)
  • Lettuce seeds (Basil, arugula, and kale also grow very well using this method)
  • Hydroponic nutrients
  • Water
  • 1 clean black crew sock to cover the jar and block light from reaching the nutrient solution
  • A measuring cup or container for mixing the nutrient solution

Tip: A black crew sock makes a simple cover for your jar. Just slip it over the jar to help keep light away from the nutrient solution and reduce algae growth. When you want to see what’s happening below the plant, simply slide the sock off and take a look at the roots. Then put it back on when you’re finished.

Step-by-Step Instructions
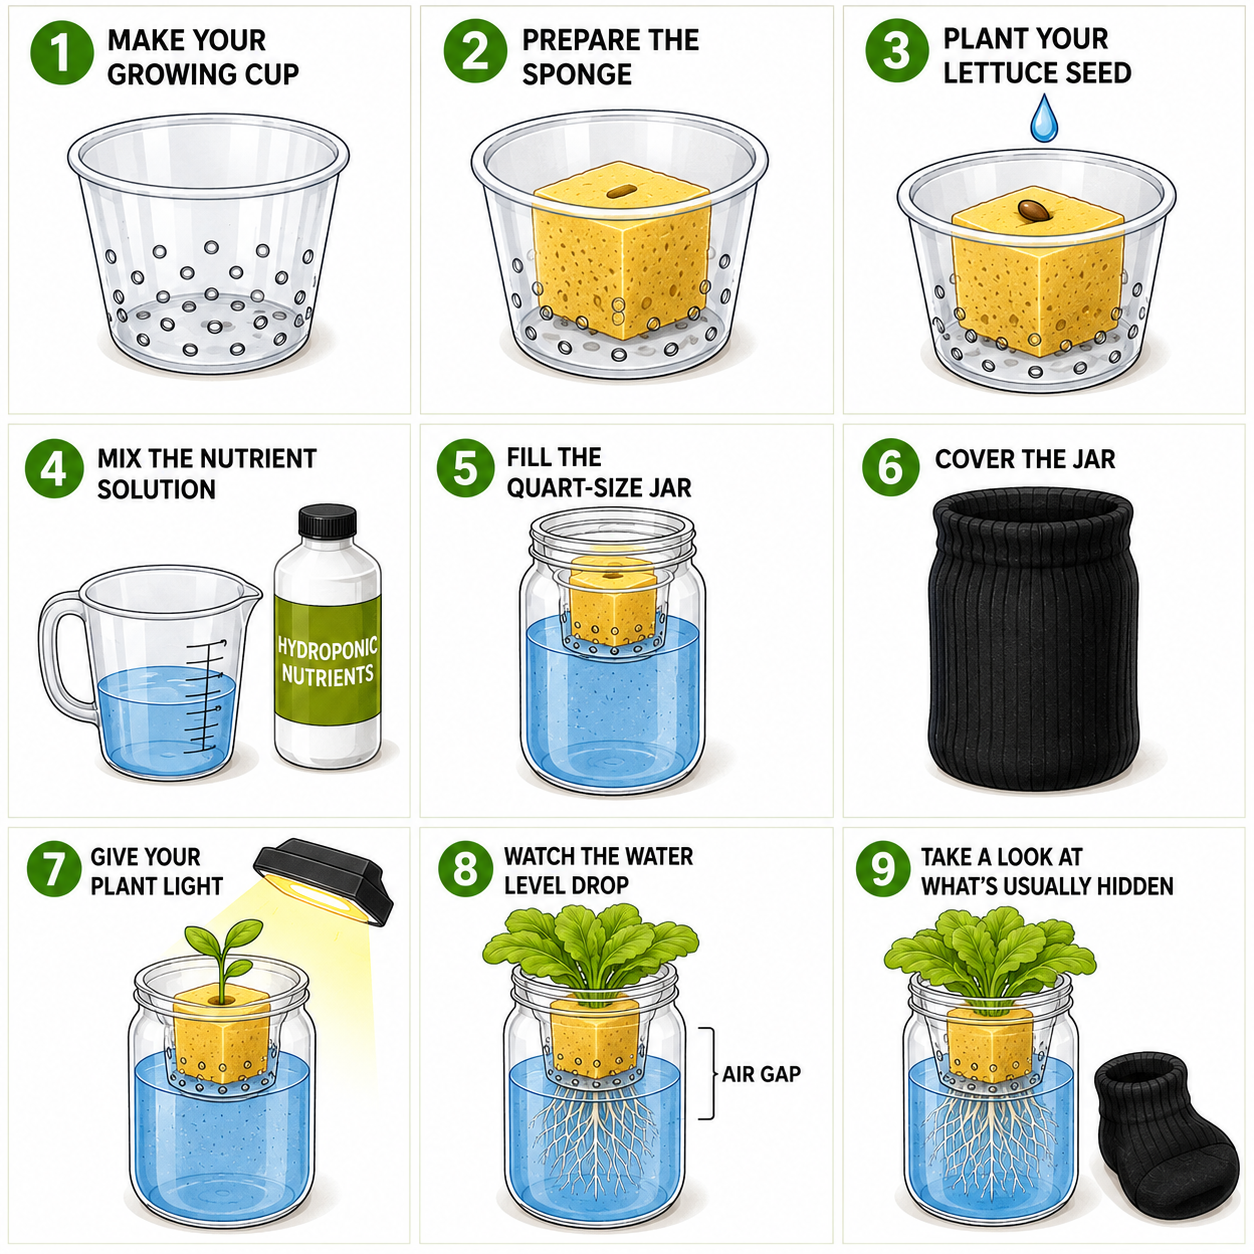
Step 1: Make Your Growing Cup

Choose a small plastic cup that will fit inside the opening of your quart-size jar.

Make several holes scattered across the bottom of the cup. Continue making holes around the sides of the cup, about 1/2 inch up from the bottom.

The holes allow water to reach the sponge and give the roots plenty of places to grow through the cup and down into the jar.

Step 2: Prepare the Sponge

Cut a clean, unused sponge into a square about 1 inch by 1 inch.

You do not need to punch holes through the sponge for the roots. Young roots can grow through the sponge on their own.

Make a small slit or shallow opening in the top of the sponge for the lettuce seed.

Place the sponge in the bottom of the plastic cup.

Step 3: Plant Your Lettuce Seeds

Moisten the sponge with water.

Place your lettuce seed in the small opening you made in the sponge.

Keep the sponge moist while you wait for the seed to sprout. Before long, you should see a tiny plant above the sponge and a root beginning to grow below it.

Step 4: Mix the Nutrient Solution

Plants need nutrients to grow. Plants growing in soil can get many of these nutrients from the soil. A hydroponic plant gets its nutrients from the water.

Follow the directions for your hydroponic nutrients and mix the correct amount with water.

This mixture of water and nutrients is called the nutrient solution.

Step 5: Fill the Quart-Size Jar

Pour the nutrient solution into the jar.

Place the plastic cup into the opening of the jar. The nutrient solution should be high enough to reach the lower part of the sponge through the holes in the plastic cup.

The sponge needs to stay moist while the seed sprouts and the young roots begin growing.

Step 6: Cover the Jar

Slip a clean black crew sock over the outside of the jar.

Why cover a clear jar when seeing the roots is one of the best parts of this project?

The leaves need light, but the nutrient solution does not. Light reaching the nutrient solution can encourage algae to grow.

The sock gives you the best of both worlds. Keep the jar covered while the plant is growing, then slide the sock off when you want to check the water level and look at the roots.

Step 7: Give Your Plant Light

Once your seed begins to sprout, your plant will need plenty of light.

Place the jar where the lettuce will receive enough light each day. If you are growing indoors and don’t have enough sunlight, you can use a grow light.

Step 8: Watch the Water Level Drop

As your lettuce grows, its roots will get longer and the plant will begin using more water. The water level in the jar will slowly drop.

Don’t keep filling the jar all the way back to the top.

The space that develops between the water and the plastic cup is important. This is the air gap. It allows part of the root system to get oxygen while the lower roots continue to take in water and nutrients.

This is one of the most important parts of the Kratky method.

Step 9: Take a Look at What’s Usually Hidden

Every few days, slide the black sock off your jar and take a look.

You started with a seed and a 1-inch square of sponge. Now you’ll begin to see roots growing through the sponge, through the holes in the plastic cup, and down into the nutrient solution.

As the lettuce grows larger above the jar, the root system below it will grow too.

When we grow plants in soil, all of this is happening where we can’t see it. With a clear quart-size jar, you get to watch what’s usually happening below the soil.

When you’re finished looking, slip the black sock back over the jar and let your lettuce keep growing.

You don’t need a large hydroponic system to learn how hydroponics works. You can start with one seed, one quart-size jar, and a few simple supplies. Before long, you can harvest lettuce that you grew yourself and you did it without any soil.
The Simple Seed Starting Method That Works EVERY Time!

One of the questions I get asked the most is, “How do you start your seeds for hydroponics?” Seed starting is also the most challenging step in growing in hydroponics. Quite frankly, it’s also the most challenging part of growing in soil, too!

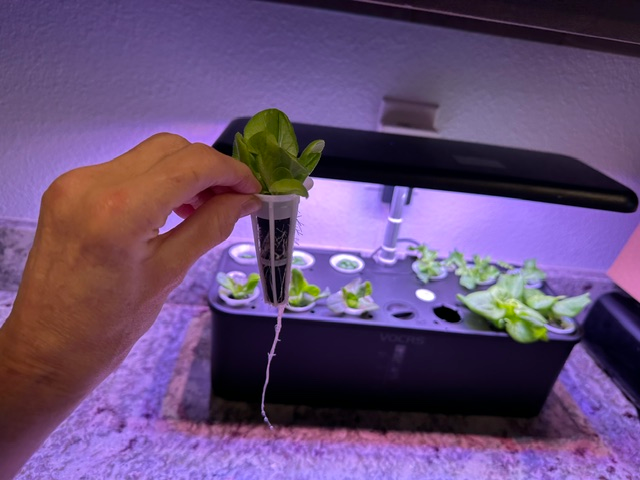
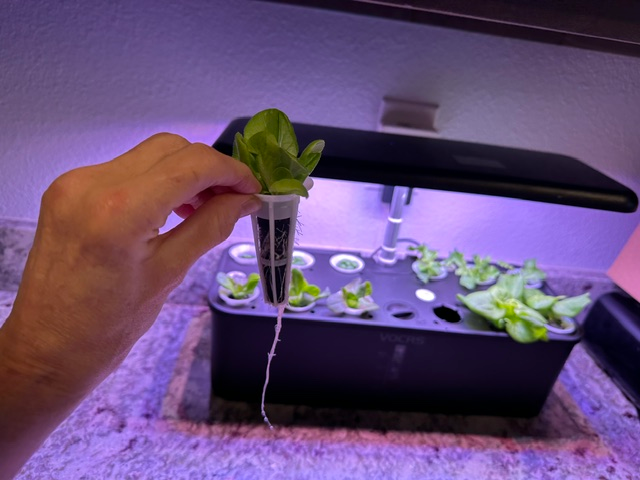
For years now, I have consistently grown 36 to 48 heads of lettuce every 30 days by starting my seeds in a small shelf top hydroponic unit. It has become one of the simplest and most dependable parts of my entire growing system.

The funny thing is, the method I use today wasn’t something I carefully planned. I actually discovered it by accident! After seeing how well it worked, I never looked back. I use a mini shelf-top hydroponic system. The current one available is made by MUFGA for under $50.

Look for a shelf-top hydroponic system that includes nutrient solution granules, grow sponges, grow baskets, tank, and a grow light that is on a telescoping pole. The light should have a timer and a setting for fruit/flowers or vegetables. The maximum number of holes or seeding baskets should be 12. I have tried some with 18 holes and it’s too many plants starting at once with not enough nutrient.

A major feature of the Mufga system is the underside of the tank lid. It has channels that take the nutrient solution to each of the baskets–like a miniature NFT system. If possible, ask the maker to see a picture of the underside of the lid. I believe this is the reason why this seed-starting method has been so successful.

Why I Love This Method

One of the biggest advantages is that I always have new plants getting started while I’m harvesting mature lettuce. Instead of planting everything at once, I keep a steady rotation going. That means fresh salads are never very far away!

This little system also saves space, produces healthy seedlings, and makes transplanting into my larger hydroponic systems quick and easy.

My Favorite Seeds

I grow all kinds of leafy greens, but lettuce is definitely my favorite because it grows quickly and produces beautiful harvests.

Some of my favorite crops to start this way include:

  • Lettuce
  • Kale
  • Swiss chard
  • Basil
  • Bok choy

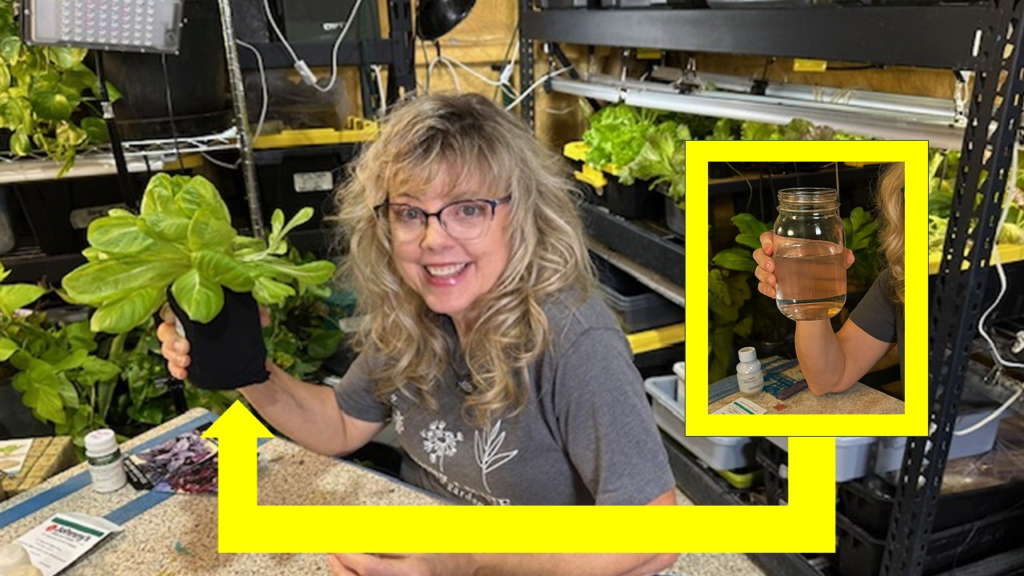
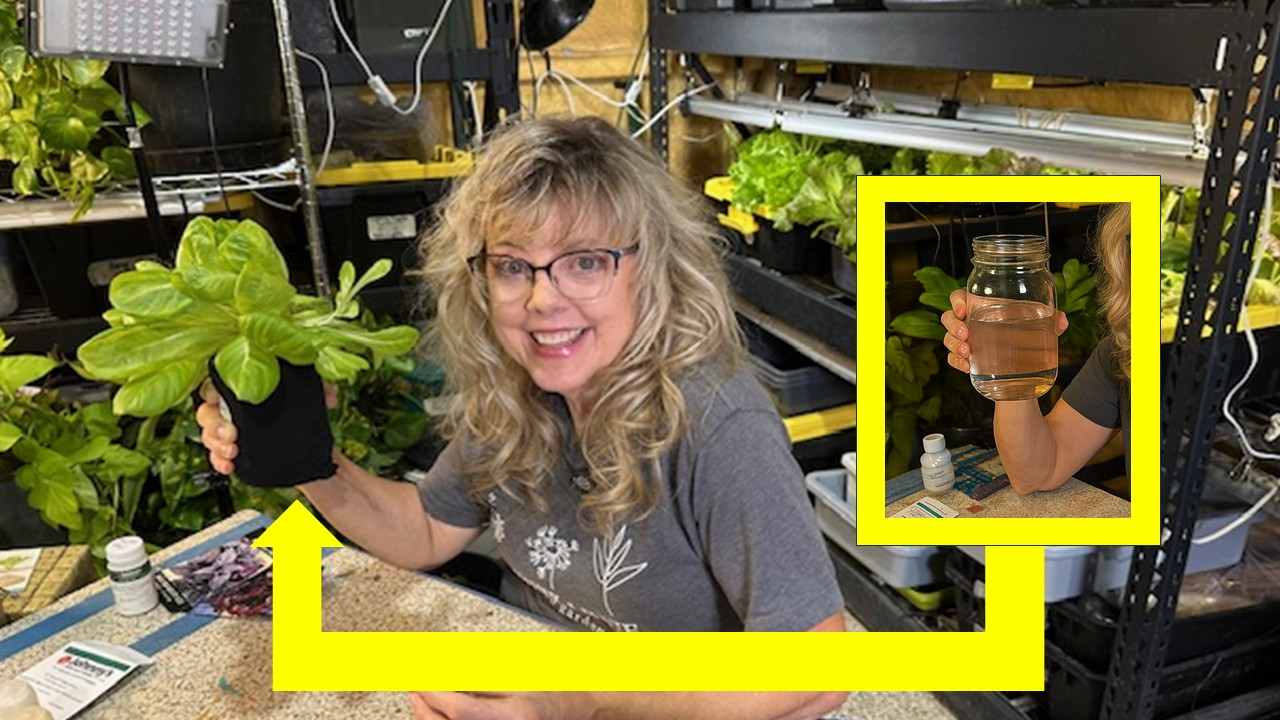
No matter what you decide to grow, starting with quality seed makes a huge difference. I order my seeds from Johnny’s Seeds.

My Secret Ingredient

Want to know one of my favorite little tricks?

Rainwater.

Whenever possible, I use rainwater when mixing my nutrient solution. Over the years, I’ve found that it gives me excellent germination and healthy seedlings. It has become one of those simple habits that has really paid off.

Watch the Video

In this video, I’ll show you exactly how I start my hydroponic seeds from beginning to end. We’ll talk about the mini hydroponic systems I recommend, my favorite seeds for leafy greens, why I love using rainwater, and every step I use to get healthy seedlings with confidence.

I hope this simple method gives you the confidence to start growing your own fresh food. There’s nothing quite like harvesting lettuce that you grew yourself.

Happy Hydroponics!

What is HYDROPONICS? It’s Simpler Than You May Think

When you hear the word hydroponics, what comes to mind? Maybe you picture a big greenhouse filled with rows and rows of plants, complicated equipment, tubes running everywhere, and someone who knows a whole lot about science. But, hydroponics really doesn’t have to be complicated.

Instead of getting water and nutrients from the soil, hydroponic plants receive them directly around their roots. Give those plants the right amount of light, water, nutrients, oxygen, and room for their roots to grow, and they can thrive without ever being planted in the ground.

We are so used to putting a seed in the ground that it seems like soil must be one of the things a plant needs to survive. Let’s think about what the soil actually does. Soil helps hold a plant in place, and it provides a place where the roots can find water, nutrients, and oxygen.

With hydroponics, we simply provide those things in a different way. The roots grow in or near water mixed with hydroponic nutrients. We call this the nutrient solution. The plant takes up the water and nutrients it needs directly through its roots. If you’ve ever lifted a hydroponic lettuce plant and seen the long, healthy roots growing underneath it, you know those roots can be pretty happy without soil!

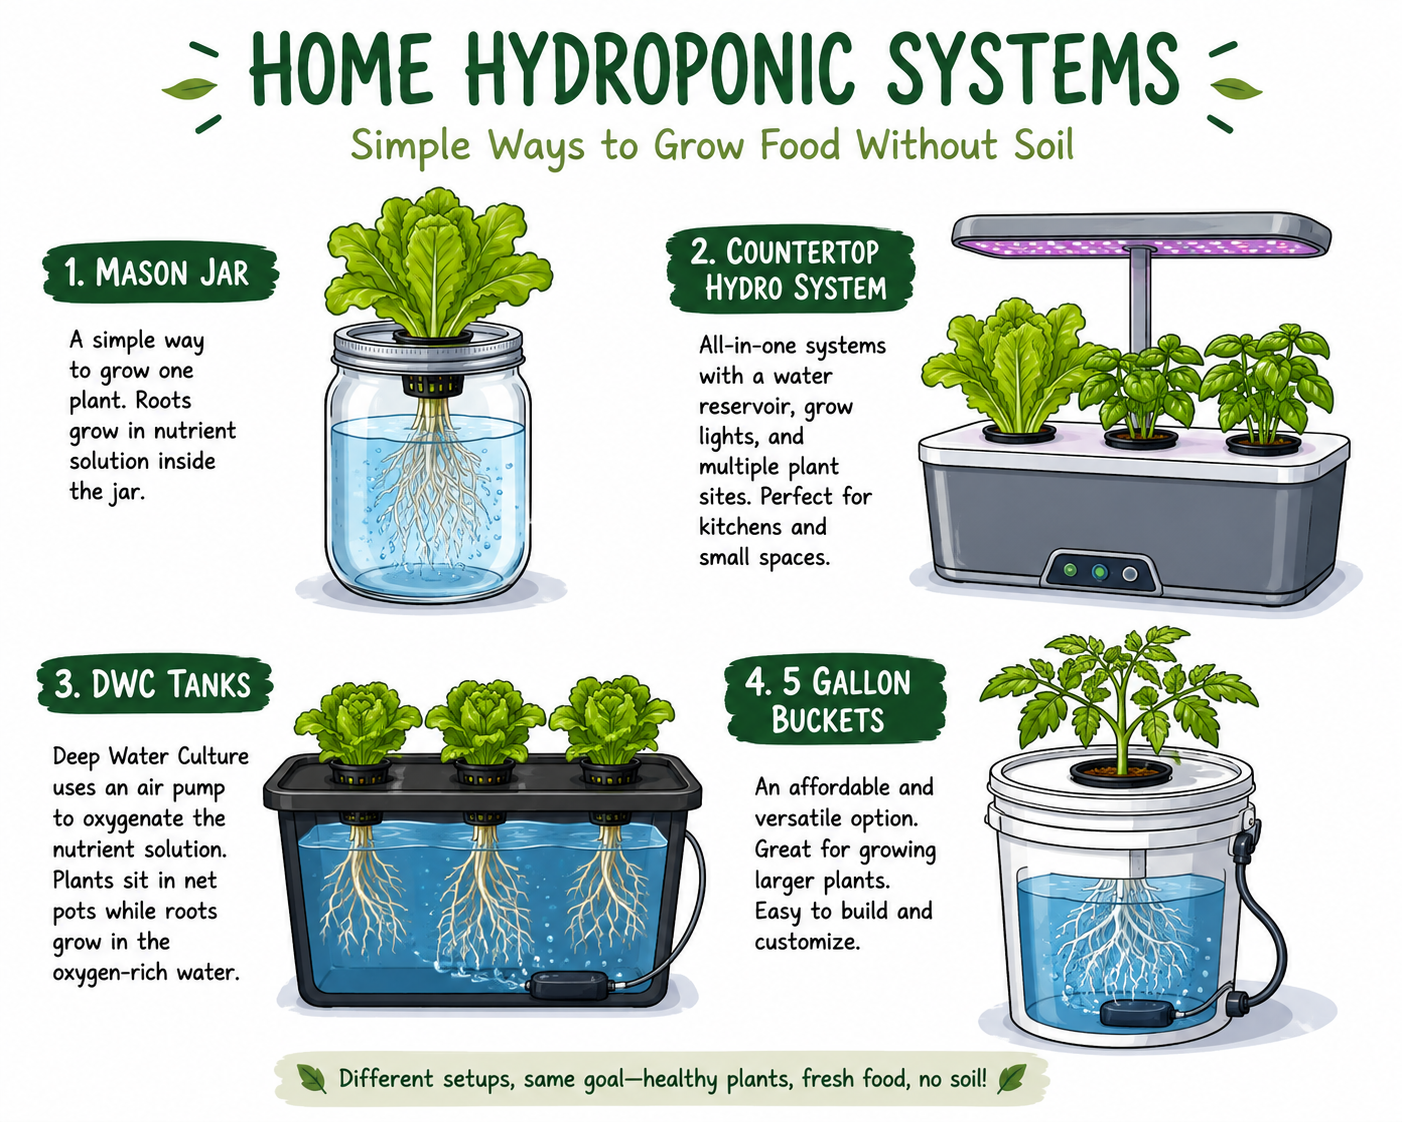
It can be a countertop garden sitting in your kitchen. It can be a lettuce plant growing from a quart-size jar. It can be a DIY system made from a 10-gallon tote. Or, it can be a large commercial greenhouse producing thousands of plants.

They’re all hydroponics. The equipment may be different, but the basic idea is the same: the plant is growing without soil, and we are providing what its roots need in another way.

Whether your lettuce is growing in a jar, a countertop garden, or a larger DIY system, the basic needs of the plant haven’t changed. It still needs:

  • Light to make food through photosynthesis
  • Water to keep the plant hydrated
  • Nutrients for healthy growth
  • Oxygen around the roots
  • Space for the roots to grow

We’re not changing what the plant needs. We’re simply changing how we give it those things. That’s one of the things I find so interesting about hydroponics. You can actually see many of the things that are usually hidden beneath the soil. Lift the lid of a hydroponic system and there are the roots. Check the reservoir and there’s the water and nutrients feeding the plant. You get a whole different view of how a plant grows.
There are lots of reasons to grow hydroponically. One of my favorites is the ability to grow food year-round. When I’m growing indoors, I’m not waiting for the right season or worrying about whether it’s too hot, too cold, too dry, or too wet outside.

Hydroponic systems can also be very water efficient because the water stays contained within the growing system rather than soaking into the surrounding ground. Then there’s one of the biggest benefits for me. I can walk into my growing area, harvest a beautiful head of lettuce, and know exactly where it came from and how it was grown.

Sometimes hydroponics is talked about as though it is completely separate from gardening. I don’t really see it that way. Whether I’m growing a tomato in the garden outside or lettuce hydroponically inside, I’m still growing a plant. I’m watching the leaves, checking the roots, providing water and nutrients, making adjustments, solving problems, and eventually harvesting something I grew myself.

The plant doesn’t care whether I’m calling it traditional gardening or hydroponics. It just wants what it needs to grow. When we understand those needs, we have a whole lot more ways to grow our own food. That’s what makes hydroponics so much fun to explore.

How to Start Lettuce Seeds for Hydroponics

The Steps for Starting LETTUCE SEEDS

Want to learn HOW TO START LETTUCE SEEDS for HYDROPONICS? Want it to be SIMPLE & SUCCESSFUL? ?✨ I’m sharing my tried-and-true methods that have consistently yielded fantastic lettuce crops for the past five years. ? Here are the steps that are included in the YouTube Video.

Step 1: Gather Your Supplies
Before we embark on this green adventure, make sure you have all the essentials: seeding media, grow trays, pelleted lettuce seeds, pH balance kit or rainwater, craft tweezers, plant tags, and a plant heating mat. Quality tools for quality results!

Step 2: Soak and Set the Stage
Discover the wonders of 1-inch rockwool cubes as we soak them in water with the ideal pH (6.0-6.5). This step sets the stage for the magic that follows. ?

Step 3: Seed Selection Wisdom
Choosing the right seeds is an art. Learn how to select seeds based on your space and preferences. Salanova lettuce seeds from Johnny’s seeds are our go-to for a whopping 98% success rate! ?

? Step 4: Cube Care
Master the art of prepping rockwool cubes, ensuring the perfect balance of moisture. We’ve got tips on gentle squeezing and proper drainage. ?

Step 5: Label Love
Add a dash of color to your gardening journey with plant labels. It’s a simple trick that keeps you organized and in control. ?️

Step 6: Sow with Precision
With craft tweezers in hand, delicately sow your pelleted seeds into each cube. Watch out for overcrowding—especially with those prolific Salanova seeds! ?

Step 7: Dome Drama
Cover your grow tray with a dome lid, creating a cozy haven for germination. We’ve got tips for adapting to different climates! ?️

Step 8: Towel Time
The first 48 hours are crucial! Learn why a simple towel can make all the difference in creating the perfect environment for your budding lettuce. ?

Step 9: Germination Glee
Uncover your tray, and witness the joy of germination. We troubleshoot common issues and ensure you’re on the right track. ?️

Step 10: Bask in the Light
As your seedlings grow, we guide you through the transition to natural light or seedling grow lights. Witness the transformation as your lettuce flourishes! ?

Step 11: Daily Delight
Stay vigilant with daily check-ins. We share tips on maintaining optimal conditions and preparing your seedlings for their hydroponic journey. ?️

Step 12: Celebration Time!
The moment you’ve been waiting for! Celebrate as your lettuce seedlings showcase multiple true leaves and roots. Your hydroponic success story begins here! ?

Happy hydroponics!

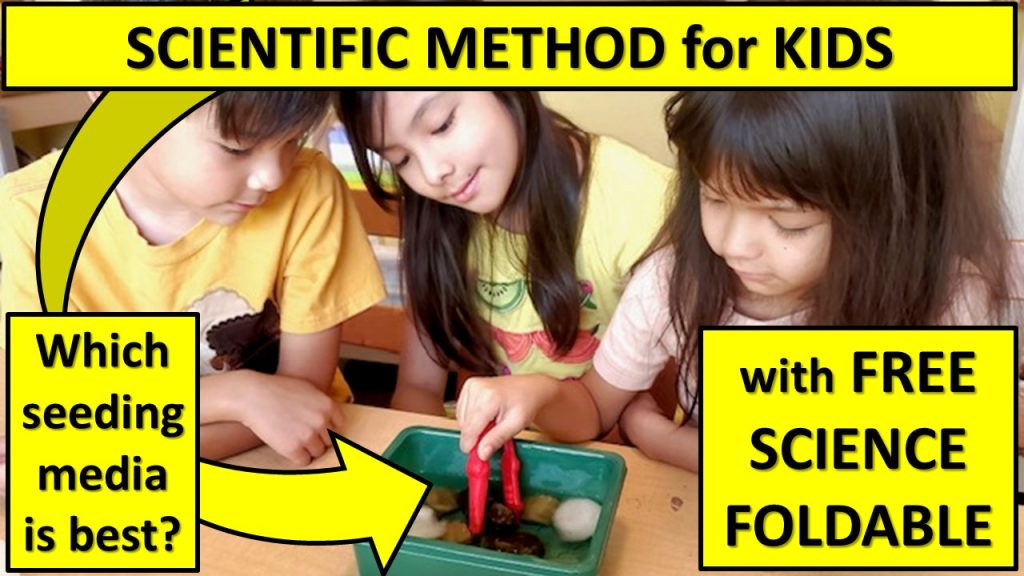
Scientific Method for Kids- Which Seeding Media is Best?

Hydroponics is the #newsciencestrategy and provides the perfect opportunity to use the scientific method on almost a daily basis. The video, SCIENTIFIC METHOD FOR KIDS, can be used as a lesson guide and provides you with a materials list, procedures, and the steps of the scientific method. Visit the Hydroponics in the Classroom page of this site to download the FREE SCIENTIFIC METHOD FOLDABLE & the FREE SCIENTIST NOTEBOOK. Both documents will engage your learners in determining which seeding media is best?

Here’s a little bit more information about each type of seeding media that is being tested by our Homeschool Scientists.

  1. Cotton:
  • Advantages: Cotton is inexpensive and widely available. It retains moisture well and provides a soft and gentle environment for delicate seedlings. It can be a good option for starting seeds that require a consistently moist environment.
  • Disadvantages: Cotton tends to break down relatively quickly, especially in a wet environment. This breakdown can hinder root growth and potentially cause issues with seedlings’ stability.
  1. Rockwool Cubes:
  • Advantages: Rockwool cubes are a popular choice among hydroponic growers and greenhouse cultivators. They provide excellent water retention while allowing for proper drainage, which is essential for preventing overwatering and root rot. They offer good support for young seedlings and promote root development.
  • Disadvantages: Rockwool is a synthetic material made from molten rock, and some growers prefer more natural alternatives. It may also require special handling and disposal due to its non-biodegradable nature.
  1. Oasis Cubes (Foam Cubes):
  • Advantages: Oasis cubes are specifically designed for horticultural applications. They offer good water retention and aeration, striking a balance between maintaining moisture and preventing waterlogging. They provide a stable environment for seedlings to grow, offering good support for the roots.
  • Disadvantages: Oasis cubes can be more expensive compared to cotton or rockwool. They are also synthetic, which might be a drawback for some environmentally conscious growers.

Each seeding medium has its pros and cons, and the best choice depends on your specific needs and preferences. Rockwool cubes and Oasis cubes are generally more popular and widely used in commercial settings due to their excellent water retention and support for root development. If you prefer a more natural and affordable option, cotton can also be suitable for certain types of plants. Ultimately, experimentation and experience will help you determine the most effective seeding medium for your particular gardening or growing situation.

Which seeding media will be the best in our experiment? Come back to the blog in two weeks and find out!

Kindergarten’s Adventure in Hydroponics!

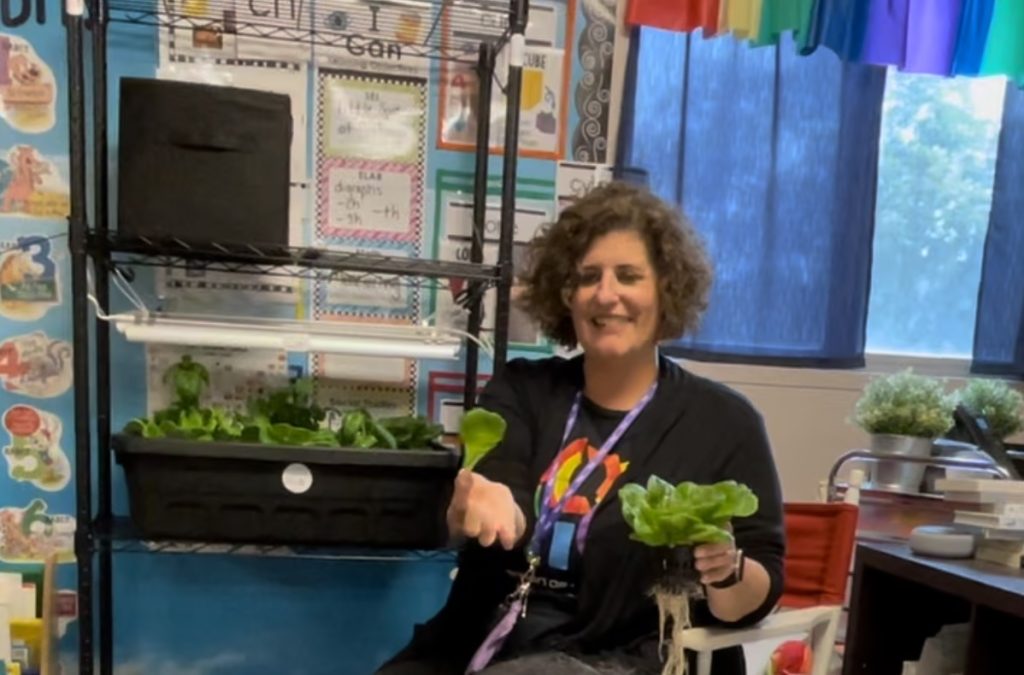
Hey there, fellow hydroponics enthusiasts! Today, I have an  inspiring story to share with you all. Imagine a vibrant kindergarten class filled with eager learners, who not only have a love for nature but also a desire to care for their beloved guinea pigs. What do you get when you combine these passions? A fantastic project that brings education, sustainability, and healthy eating habits to the forefront: growing lettuce in a DWC hydroponics system to feed their furry friends!

These young green thumbs and their incredible teacher, Ms. Angelo, decided to ditch the traditional soil gardening methods and embrace the world of hydroponics. DWC, or Deep Water Culture, hydroponics involves growing plants in a nutrient-rich solution instead of soil. It’s an excellent way to explore alternative gardening techniques and teach children about sustainable agriculture.

With the help of Terra Hill Farm and Hydro4Food, the kindergarteners began their hydroponic journey with a DWC system in their classroom. They were amazed by the fact that plants can grow suspended in nutrient. The setup was not only visually appealing but also served as a captivating learning experience for the young minds.

As the days went by, the children eagerly observed their lettuce plants flourishing in the hydroponics system. They diligently monitored the growth of all of the plants using their math skills in an important, real-world project. The kindergarteners delighted in watching the plants grow taller and greener each day.

But what was the purpose of this lettuce-growing adventure, you might ask? Well, these thoughtful little hydroponic farmers were not just growing lettuce for their own enjoyment. They had a special mission in mind: to provide fresh, homegrown greens for their adorable guinea pigs, Oreo and Coco. This project encouraged the children to develop a sense of responsibility and empathy towards their furry companions, understanding the importance of a nutritious diet for their well-being.

As the lettuce reached maturity, the kindergarteners practiced cut and come again harvesting and fed the leaves they grew to their guinea pigs. This hydroponic adventure left a lasting impact on the young minds of Ms. Angelo’s kindergarten class. Not only did they witness the wonders of nature firsthand, but they also learned valuable lessons about sustainability, responsibility, and the importance of eating fresh, healthy food.

Thank you, Ms. Angelo, Ms. DeMoss, Ms. Podany, and Village Tech Schools for GROWing on this Hydroponic Adventure with us!


Hydroponics or Soil for Leafy Greens?

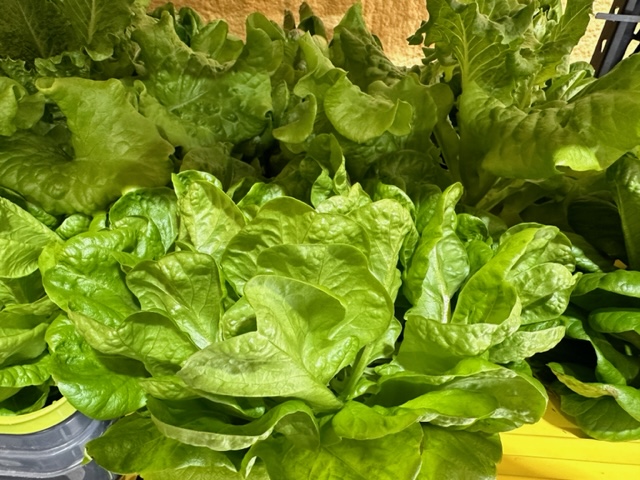
Pounds of LETTUCE from just one shelf!

There are several advantages of growing leafy greens in hydroponics instead of in an outdoor garden. Here are the top 5:

  1. Water efficiency: Hydroponics systems use significantly less water than traditional soil-based gardens, as the water is recirculated through the system and can be reused multiple times. This can be particularly beneficial in areas where water is scarce or expensive.
  2. Faster growth and higher yields: Plants grown in hydroponics systems often grow faster and produce higher yields than those grown in soil. This is because the plants have constant access to water, nutrients, and oxygen, allowing them to grow more efficiently.
  3. Control over growing conditions: With hydroponics, growers have complete control over the growing environment, including the temperature, humidity, and nutrient levels. This can help to optimize plant growth and yield, and can be particularly beneficial in areas where outdoor growing conditions are less favorable.
  4. Reduced use of pesticides and herbicides: Hydroponic systems are often less susceptible to pests and diseases than outdoor gardens, due to the absence of soil-borne pathogens. This can help to reduce the need for pesticides and herbicides, making hydroponic produce a more environmentally friendly option.
  5. Year-round production: Hydroponic systems can be operated year-round, regardless of the weather conditions outside. This can be particularly beneficial in areas with long, cold winters or hot, dry summers, where outdoor gardening may be challenging or impossible.

6. Hydroponically-grown lettuce tastes SO MUCH BETTER THAN STORE-BOUGHT LETTUCE!!!

Tools for Hydroponic Gardening, Heat Mats

What tools does a hydroponic gardener need? Hydroponics is growing plants using a water-based nutrient solution instead of soil. So, all I need is nutrient solution and some seeds, right? Hmmm…not quite…

First, you’ll need seedlings to transfer into your hydroponics system. To grow seeds into seedlings you’ll need a few tools. This blog is about one of my favorite tools called a plant heat mat.

What is a plant heat mat?

A plant heat mat is a gardening tool used to provide a warm and consistent temperature for seedlings and young plants. It consists of a flat, electrically-heated pad that is placed underneath a grow tray or pots. The heat mat is designed to provide warmth to the roots of the plants, which helps to stimulate germination and growth.

The temperature of a plant heat mat can vary depending on the model and brand, but most heat mats are designed to maintain a temperature range of 10-20 degrees Fahrenheit (6-11 degrees Celsius) above the ambient temperature of the room. This means that if the room temperature is 70°F (21°C), the heat mat will maintain a temperature of around 80-90°F (27-32°C) in the area where the seedlings are growing.

At this point are you realizing that you will need to monitor the temperature of the heat mat? A temperature sensor, if you have one, will work for this purpose. However, if you’re anticipating growing a lot of plants, you may want to purchase a heat mat with an adjustable thermostat.

Why bother with a plant heat mat?

It’s all about germination! Germination rate is the percentage of seeds that sprout and begin to grow. The higher the germination rate, the more successful your planting efforts will be. Using a plant heat mat under a grow tray can significantly increase the germination rate of your seeds. This is because a heat mat provides a consistent, warm temperature that helps to stimulate seed germination.

Read about these loofah seeds that grew like CRAZY in just a few days.

When do you remove the heat mat?

As a general rule of thumb, you should remove the grow tray from on top of the heat mat once the majority of the seeds have germinated and the seedlings have begun to grow. This typically takes anywhere from a few days to a couple of weeks, depending on the specific plant species.
To determine if it’s time to remove the grow tray from the heat mat, you can use a thermometer to monitor the temperature of the soil or growing medium in the tray. If the temperature is consistently above the recommended range, it’s time to remove the tray from the heat mat.

Last piece of advice about heat mats

On MIGardener’s YouTube Channel, he suggest that you cut a piece of corrugated card the size of the heat mat and place it between the grow tray and the mat. One of MI’s viewers has had much success putting a piece of Styrofoam between the plant heat mat and the surface on which it sits. I tried both of these suggestions and they WORK!

Overall, using a heat mat can be a great way to increase the germination rate and growth of seedlings. If you’re seeds don’t germinate, don’t give up! Gardening is a trial-and-error process, and it may take several attempts to get the results you want.

Happy Germinating!

The Joy of Hydroponic Gardening

Every day you can find joy in hydroponic gardening. It’s the joy of watching new seedlings sprout, flourish, and mature into ready-to-harvest plants. And, it’s the satisfaction of being self-sufficient and sustainable, knowing that the food you grow is fresh, healthy, and pesticide-free.

Three hydroponic shelves in our shop

One of the best things about hydroponic gardening is the ability to start new seedlings at any time of the year. Whether it’s the dead of winter or the middle of summer, you can always propagate new plants and enjoy the thrill of watching them grow. An added bonus? This hydroponic gardener is never too cold or too hot, because my garden is indoors! [Watch the FREE YouTube Series, Get Growing! Hydroponics Training Online on the GlennaTabor YouTube Channel.]

In hydroponics, you can germinate seeds to grow into seedlings to be transplanted into raised beds or other growing containers, you’ll feel a sense of pride and accomplishment knowing that you’ve nurtured them every step of the way. Plus, you’ve saved a LOT of money!

Loofah & comfrey seedlings will be transplanted to raised beds in a few weeks.

But hydroponic gardening isn’t just about growing vegetables and herbs. It’s also a great way to propagate fruit trees, like fig trees, for example. By taking cuttings from mature trees and rooting them in a hydroponic system, you can grow new trees that will provide you with fresh, delicious fruit for years to come.

One week from harvesting!

One of the best things about growing things hydroponically, though, is the peace and quiet that comes with it. There are no noisy tractors, no smelly fertilizers, and no invasive weeds. Instead, it’s just you and your plants!

If you’re looking for a way to connect with nature and enjoy the daily joy of growing things, consider hydroponic gardening. It’s self-sufficient, sustainable, satisfying, AND, it tastes good!

Steps for Starting Seeds at Home in Grow Trays

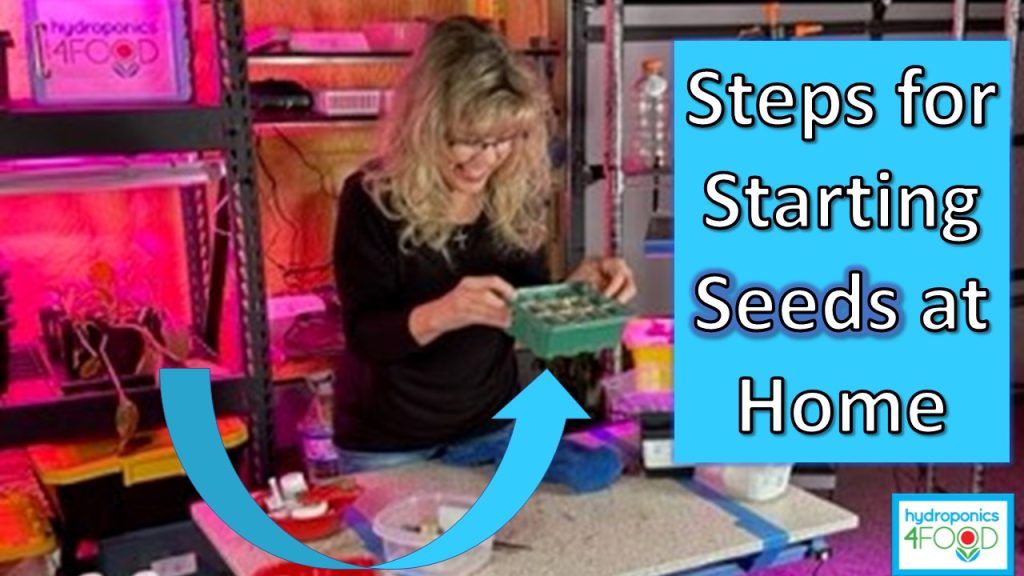
Steps for Starting Seeds at Home

Disclaimer: After hours & hours studying all the plant experts and much personal experience, I have realized there are NO OFFICIAL STEPS for starting your seeds at home! I’m simply going to share the way to start seeds that has repeatedly worked best for me. I use grow trays with domes & a plant heat mat.

One of the best ways to ensure that your plants have a healthy beginning is by germinating seeds in grow trays with domes. This method is especially useful for my favorite kind of gardening– hydroponic gardening!  Hydroponics is a soil-less growing technique that relies on nutrient-rich water instead.

First, let’s talk about grow trays. These trays are often made of plastic and come in various sizes. They’re designed to hold soil or hydroponic growing media and are perfect for starting seedlings. One of the benefits of using grow trays is that they allow you to start multiple plants at once, making the most of the available space. I like the reusable, 12-space grow trays because they are easier to manipulate.

Now, let’s talk about domes. Domes are plastic covers that fit over the top of your grow trays. They’re designed to create a humid environment, which is perfect for seed germination. The humid environment helps to retain moisture and warmth, which encourages the seeds to sprout. Placing the grow tray with moist seeding media and seeds on a plant heat mat speeds up the germination process.

Subscribe to my Hydro4Food Newsletter & I’ll send you a link for a downloadable FREE guide, “Steps for Starting Seeds at Home.” Whether you’re a seasoned gardener or just starting out, give grow trays and domes a try. Your plants will thank you for it!

Get Growing with Grow Trays! This video shows you how!

Starting Plants in Hydro Tanks

SAVE $$$ BY STARTING SEEDS & SEEDLINGS IN YOUR HYDRO TANK! If you have a hydroponic system, then you have a perfect money maker! Hydroponic tanks are a great tool for germinating seeds and encouraging seedling formation.

While I have started many seeds in my grow trays & DWC tanks, my favorite seeds to watch grow are loofah seeds. They are just incredibly gratifying to watch grow.

The picture to the left shows loofah seeds that were started just four days ago! Once they are placed in a hydro tank under a grow light they almost explode in growth!

I planted two loofah seeds & this is the crop of seeds!

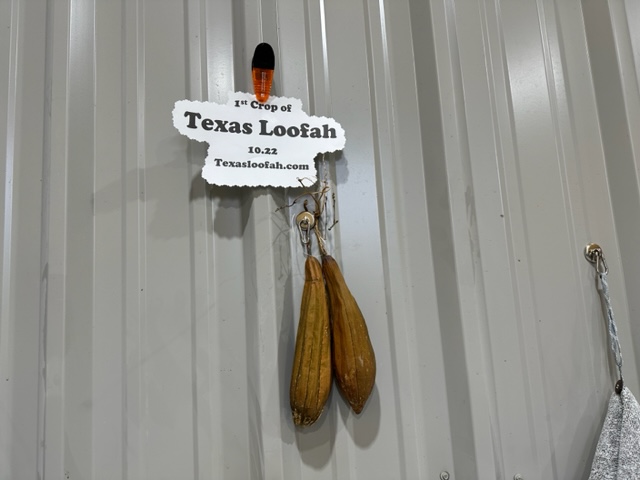
Loofahs are edible. This immature loofah gourd is the right size for eating in stir fry. You can also eat the flowers and the leaves.

The mature loofah gourd is really a cool tool! It can be used as a dish scrubber. I haven’t used a dishcloth for years!

But wait, there are MORE uses for dried loofah!

  • Scrubbing grills, ovens, & car wheels
  • Organic cleaner in gardens
  • Skin exfoliator
  • Media for planting seeds
  • Supports starting plants in raised beds & gardens
  • And, so on…

Basically, whenever you would use a rag or sponge or scrubber, you can use a loofah instead. When you’re finished, it is repurposed

Why Use Pelleted Seeds in Hydroponics?

It’s a “Seed to Salad” Blog, so let’s begin with my favorite type of seed. No, it’s not a type of vegetable or flower, but it’s the type of seed that saves me a lot of time when germinating seeds for my hydroponics system.

A pelleted seed is a seed that is coated with an inert, organic material such as clay.

Seeds are pelleted by tumbling them with the coating materials and gradually adding moisture. Once the pellet coating reaches the desired size, the pelleted seeds are cured (dried).

Pelleted seeds…

  • Are easier to plant & manage
  • Have a higher germination rate
  • Are less likely to mold or rot in a hydroponic system
  • Are big enough for you to find them

And, pelleted seeds are just more fun–especially with criss-cross tweezers!